
This is a complete guide to easily learn how to home develop C41 color film in your kitchen or bathroom without any special equipment.
In fact I’ve been home developing C41 for only a short while but I’ve learnt a lot that should help you get started quickly and easily.
In this guide I’ll show you exactly how I develop my film, let’s cover the following:
- What You Actually Need
- Choosing Your Chemicals
- Setting Up Your Home Lab
- Loading Your Film
- Develop Your C41 Colour Film (Easily)
- Dry Your Film
- Common Mistakes
- Resources
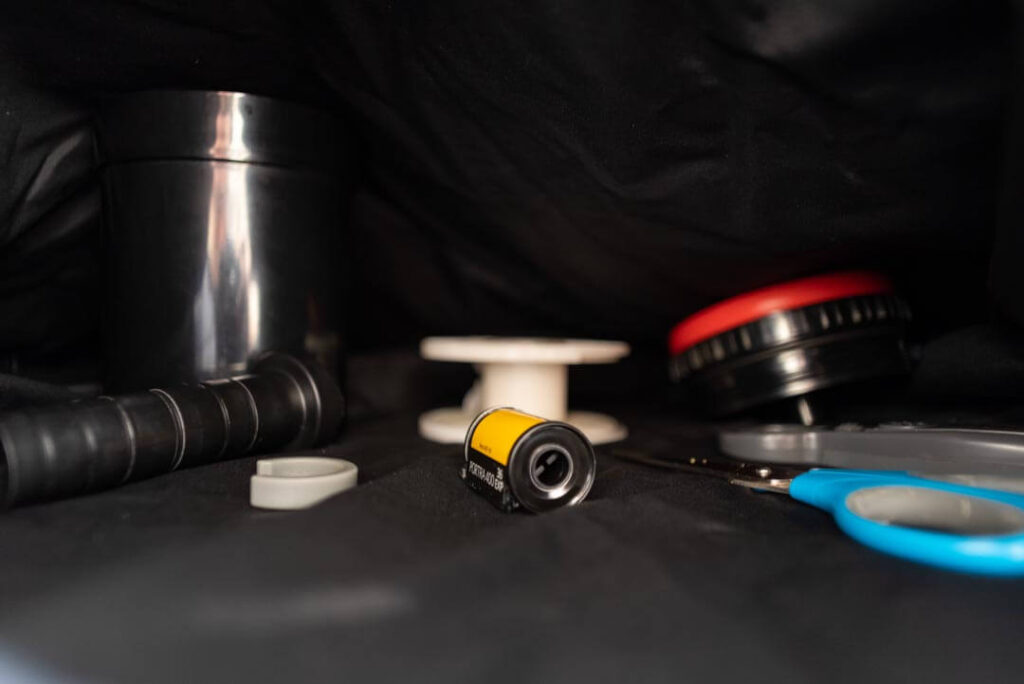
What You Actually Need
I used to think of developing film required a specialty dark room in a closet or basement.
But the truth is you can do this anywhere, it’s super easy.
Here’s a list of the gear you actually need to do this, and also a few optional items which may make the process a bit cleaner or easier.
What You Need
- Changing bag
- CineStill CS41 powder chemicals (or similar)
- 2 x chemical storage bottles with lids (glass is best)
- Thermometer
- Developing tank and reels
- 1L measuring jug
- Access to a sink or tub
- Film clips or clothes pegs
- Stopwatch or timer
- Film spec sheet or developing times app
Optional Extras
- Bottle opener (only for 35mm film)
- Scissors (only for 35mm film)
- Small funnel
- Film squeegee or a wetting agent
Choosing Your Chemicals
The traditional colour or C41 development process takes up to five stages;
- Developer
- Bleach
- Fix
- Wash
- Stabilizer
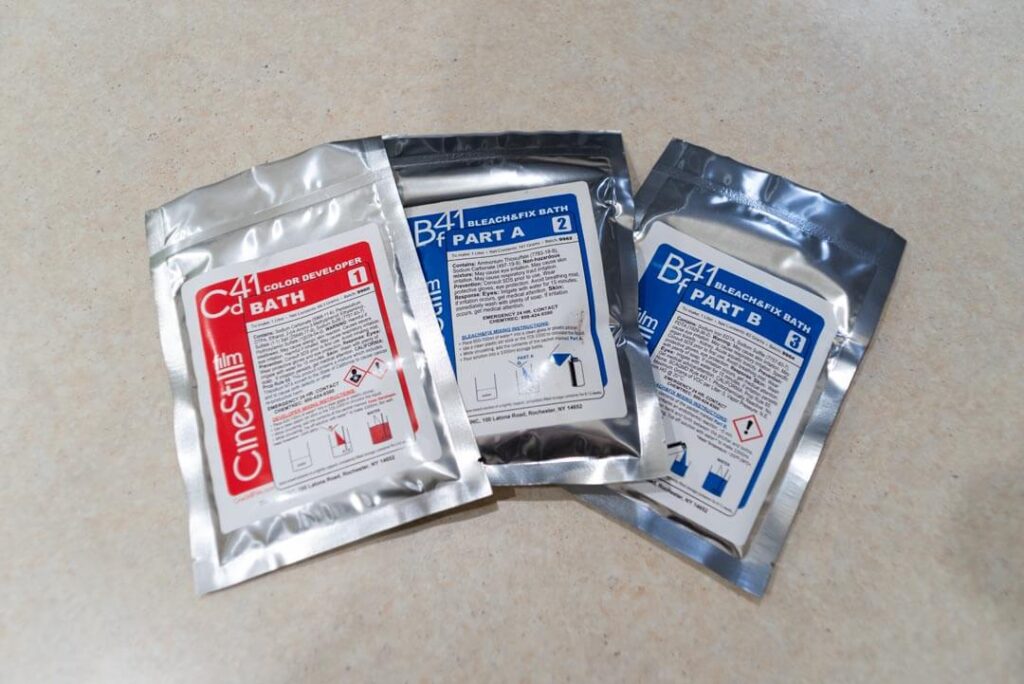
Thankfully, many modern development chemical kits for C41 now combine the bleach and fix into a single step to make everything easier and quicker.
These are called 2-bath kits, and are what I recommend starting with.
Modern film stocks also include chemical stabilizers in the film emulsion, so the stabilizer bath step is no longer needed unless you’re processing older film from the 1990’s or earlier (CineStill agrees).
That’s all good news. This means our five step process can be shortened to just three!
- Developer
- Blix (bleach and fix)
- Wash
There are many colour development kits available from different manufacturers, but I personally use the CS41 2-Bath Kits by CineStill. They are consistent, easy to use and affordable.
You should try to match your chemical quantity with your storage bottles. I always use 1L kits with 1L storage bottles and measuring jug so I’m not wasting larger amounts of chemicals if I don’t develop new film for a while.
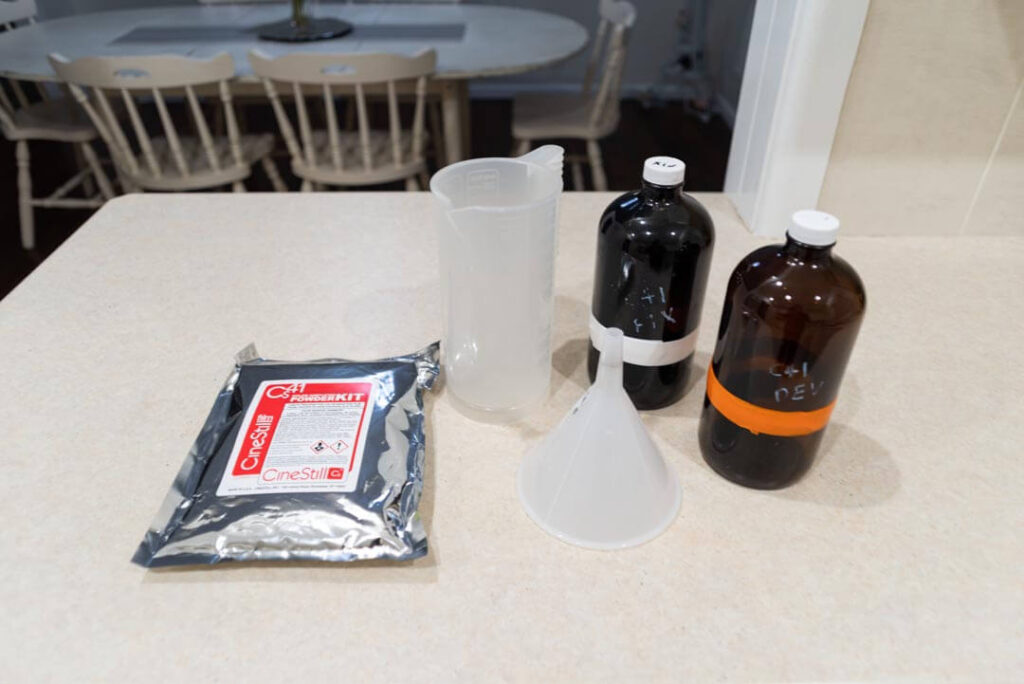
Mixing your chemicals is straight forward – follow the instructions that came with your kit. Make sure to clearly mark your bottles so you don’t mix up your developer and your blix!
You can buy chemicals in either powder or liquid form, either is fine and it’s entirely up to you.
Setting Up Your Home Lab
This is the part that put me off home developing colour film for a long time. I always thought I needed a dedicated dark room.
It turns out, all you really need is a room with a sink and hot water. I use my kitchen late at night (or the bathroom during the day).
Here’s my checklist to makes it easy:
- Sink, bucket or container
- Hot tap water
- Bench or table
- A clean, dust free area to hang your film (shower is perfect)
You will also need some bench or table space so you can load everything into your dark bag, but if you don’t have a sink everything could also be set up in a bath tub or a large container.

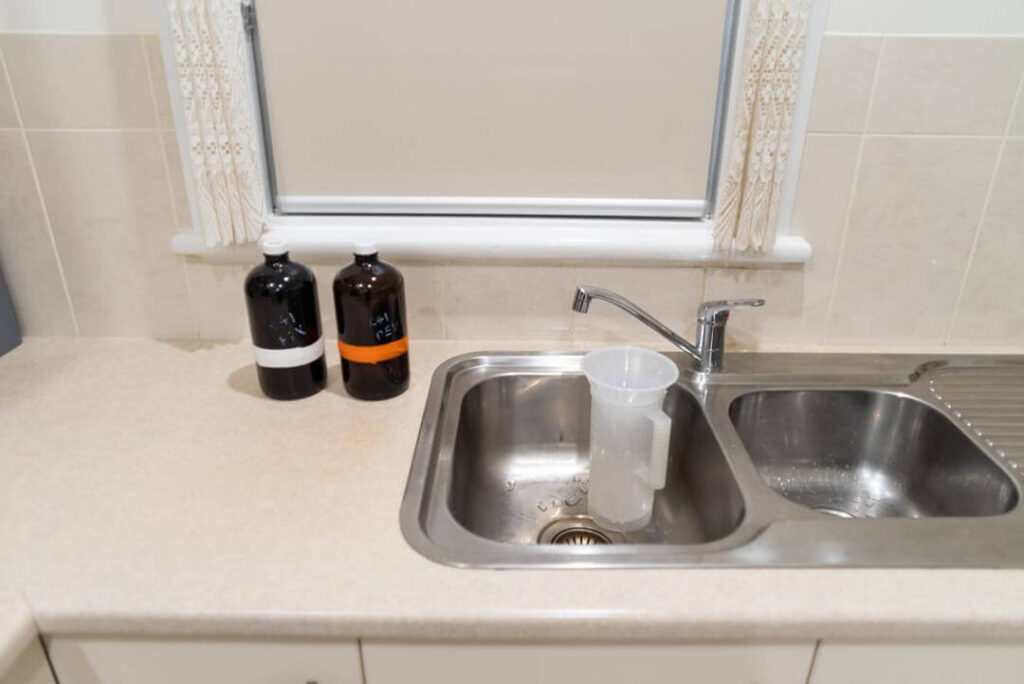
Once you’ve got a space, fill your sink/container with hot tap water and sit both of your chemical bottles in the hot water so they can be brought up to temperature.
While the chemicals warm up, you can start loading your film to get your tank ready.
Loading Your Film
Loading your film in a dark bag takes some practice, you’ll be doing everything without sight so this is something you might want to practice with a test roll outside the bag a few times.
Once you’ve done it a few times it will be second nature.
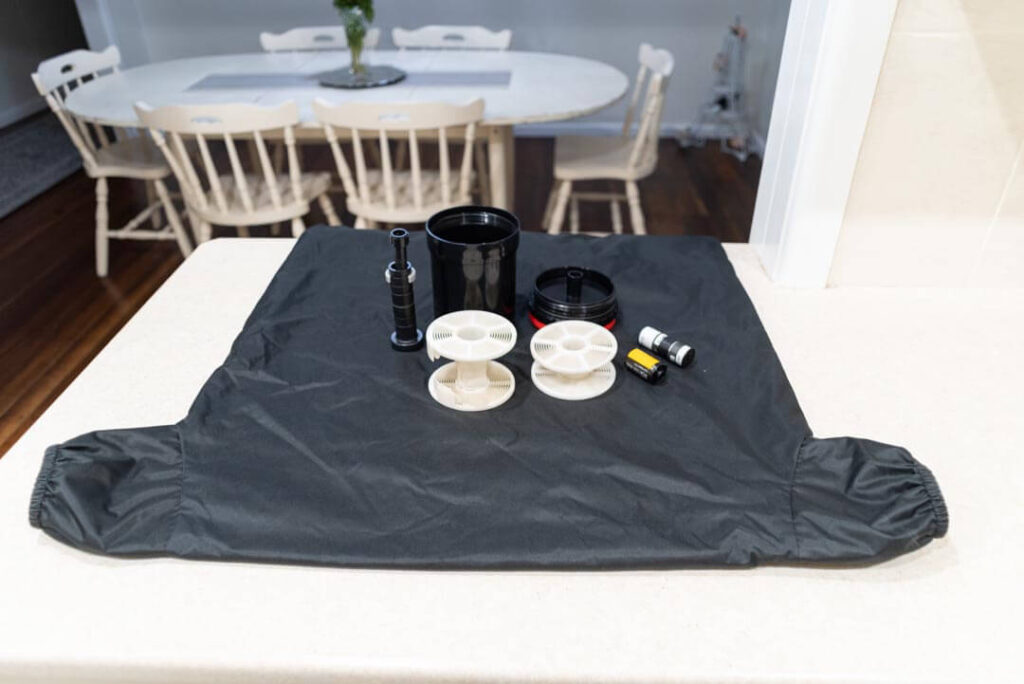
Place everything you need inside your dark bag and double check you haven’t missed anything.
- Your exposed roll/s of film
- Developing tank
- Film reel/s
- Tank spindle and lid
- Can opener and scissors (if doing 35mm film)
You will need to open your 35mm film canister with the bottle opener (just pry one of the ends off) or peel open your 120 film.
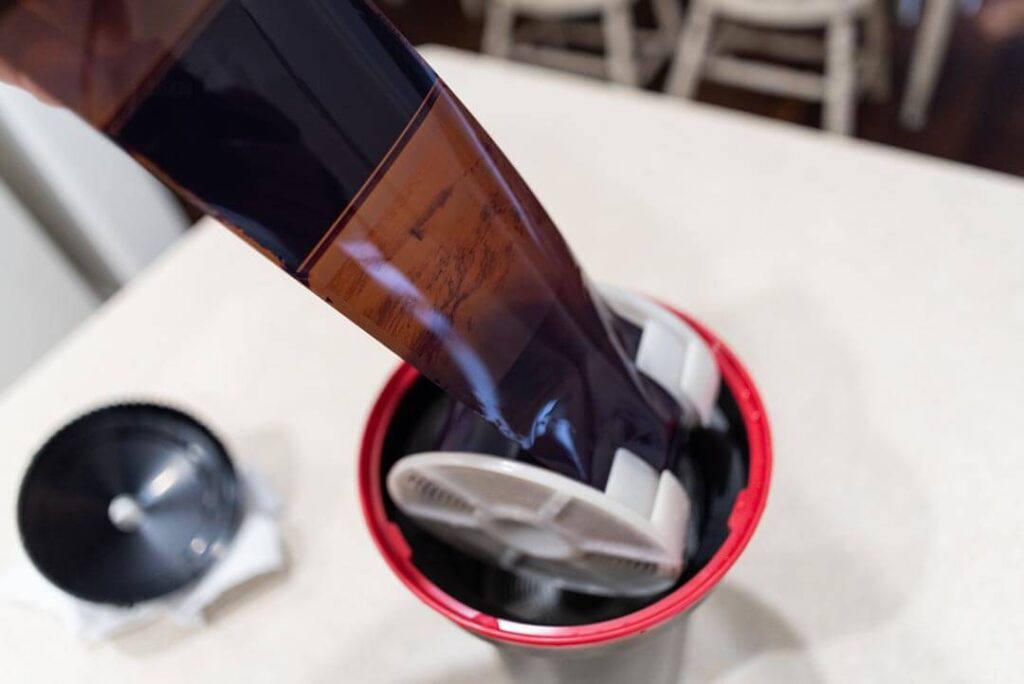
Find your film edge by feel and feed in into your film reel that you’ve preset the sizing for. For 35mm film you’ll want to cut the tag end of the film so it’s square to make it easier to wind on.
Once the film has pushed into the reel you should be able to crank it on with small back and forward rotations until you get to the end of your film roll.
Once the film is on you can tear off the backing paper for 120 film (it’s usually held with masking tape) or cut off the canister for 35mm film as close to the end of the roll as possible.
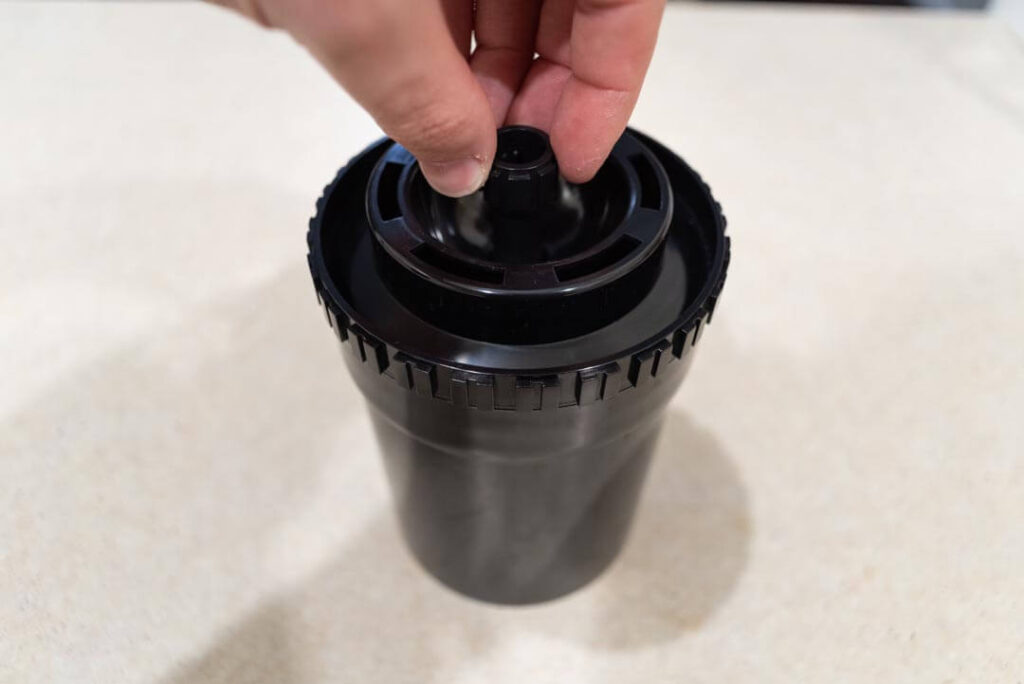
Slide your now loaded film reel onto the tank spindle, place it inside your development tank and secure the lid. It’s now safe to open your dark bag and your film is safely loaded and light sealed ready to develop.
Develop Your C41 Colour Film (Easily)
Now it’s the fun and scary part.
This is my recommended developing process if you’re starting out. It’s what I follow and I’ve only screwed up one roll (touch wood).
- Check temperature
- Check times
- Pre-soak your film (30 seconds)
- Develop
- Rinse (30 seconds)
- Blix (10 minutes)
- Wash
1. Check Temperature
Your chemicals were warming up in the sink or container while we loaded our film. Now we have to check the temperature so we develop for the right amount of time.
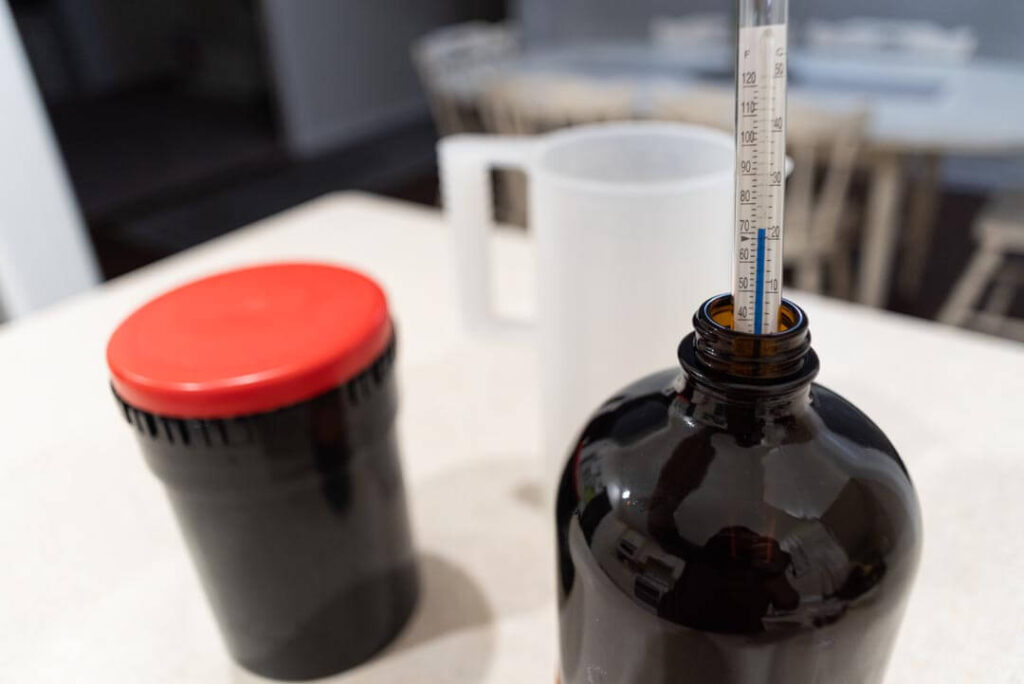
This is the part that people will often freak out about and over complicate. The temperature is NOT THAT IMPORTANT. We can develop colour film at any temperature as long as we know what it is to accurately compensate our times.
So, check the temperature of your developer. I aim for 30°C/86°F to 40°C/104°F. If it’s cooler you’ll be developing for longer, no big deal.
2. Check Times
We need to check our film charts to work out how long we should develop for at the temperature we’ve measured.
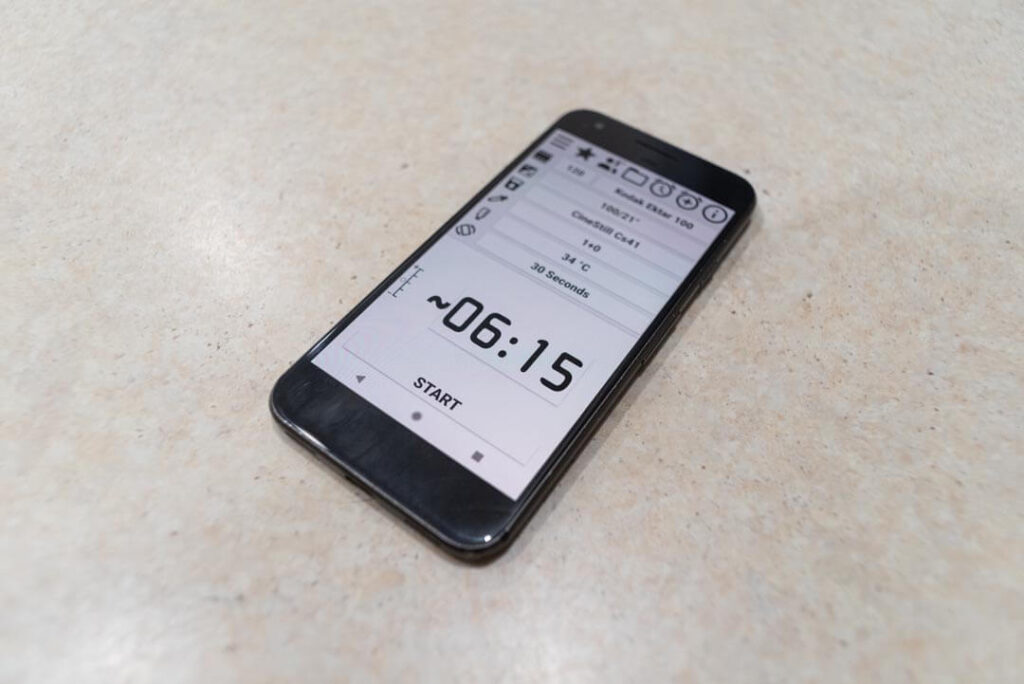
Best places to check this are:
- The online Film Dev Chart table
- On your film packaging
- Use a film developing app (I use Film Developer Pro)
This will give us our developing time to set your timer.
3. Pre Soak Your Film (30 seconds)
With the same warm water that we used to warm up your chemicals in your sink or container, fill your developing tank and let your film soak for 30 seconds to a minute.
This does a few things; it warms up the film and tank to the same temperature as your developer, it soaks the film to help it absorb developer right away, and it washes away some of the emulsion to prolong your developing chemicals.
After 30 seconds you can discard the pre wash water and your film is ready for developer.
4. Develop
Now the magic starts!
Measure out how much developer you need for your tank, if you’re unsure just fill your tank all the way. You want to make sure your film is completely covered with developer.
Once it’s all in, start your timer!
Normally you will need to agitate your film continuously for the first 30 seconds, and then a short agitation every 30 seconds until the timer is up.
Some tanks need to be inverted to agitate the chemicals, but the Paterson tanks I use have a spindle so I can easily spin the film a few times to move the chemicals around.
After each agitation give your tank a short hard bump on the table or counter top to help remove any bubbles resting on the film so they don’t cause marks.
Once it’s done you can return your developer back into your chemical bottle to reuse another day.
You should easily get 10 rolls developed from a 1L kit, and you can increase this with experience by adjusting your developing times.
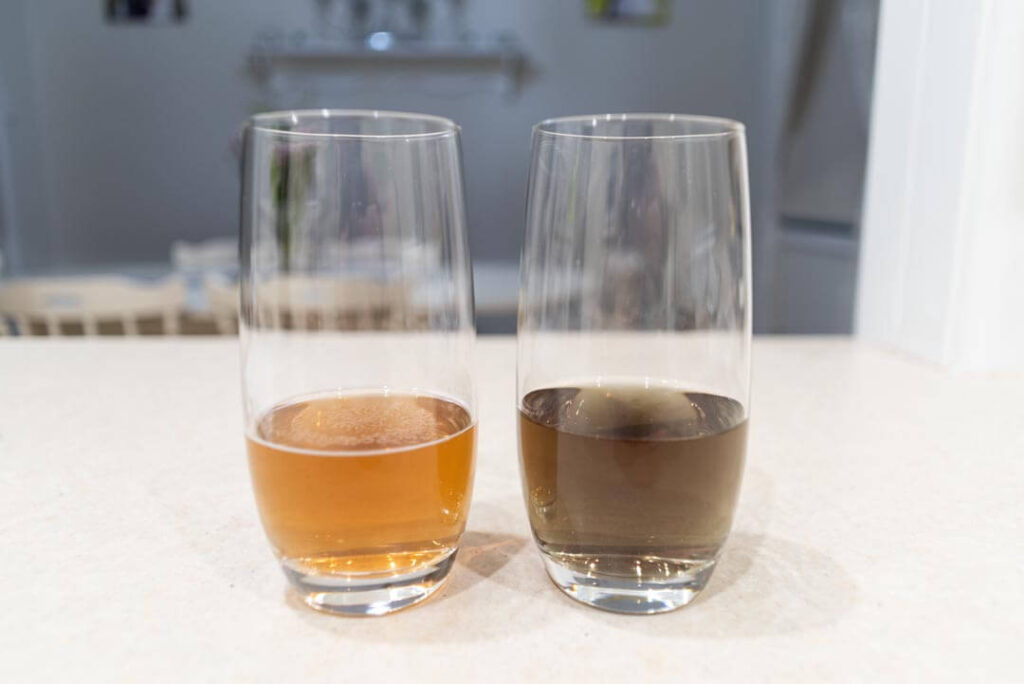
Good developer should look like beer or whisky, bad developer will go dark and muddy.
5. Rinse (30 Seconds)
After your developer is poured out, I once again rinse with warm water to remove any developer residue before moving onto the blix.
This helps preserve your blix solution by removing extra developer that it needs to work through.
A 30 second rinse with agitation should be enough here.
6. Blix (10 Minutes)
Now our blix goes in. All the steps after the developer are not as temperature sensitive, so it doesn’t matter if the blix has cooled down during the developing stage.
Fill up your tank again and follow the same process; 30 seconds agitation to start, agitate every 30 seconds until time’s up, bump the air out as you go.
I always blix for 10 minutes. Developing times may change, but blix is always 10 minutes.
If you don’t blix for long enough you’ll get developer residue in the form of circles or edging on your negatives that screw up the exposure and colour in your film.
Return your blix back into it’s bottle when you’re done, this can also be reused for quite a long time.
7. Wash
You can relax now, the development is finished and nothing else is time sensitive.
The final wash is important in order to remove any blix residue, to help your film dry and cure properly so that it can be archived safely.
The easiest wash process is the Ilford method:
- Fill the tank and invert/agitate five times, empty
- Refill and invert/agitate the tank ten times, empty
- Refill and invert/agitate the tank twenty times, done
Some people like to use a drying agent during the wash which helps remove water residue while the film dries. If you’d like to do this you can buy a premix drying agent, I’ve never bothered and just squeegee my film.
Dry Your Film
Well, well, well look at you – you’re a film developer!
All the hard work is done, your film is developed and stabilized, and if you’ve done everything right you should see images on your rolls.
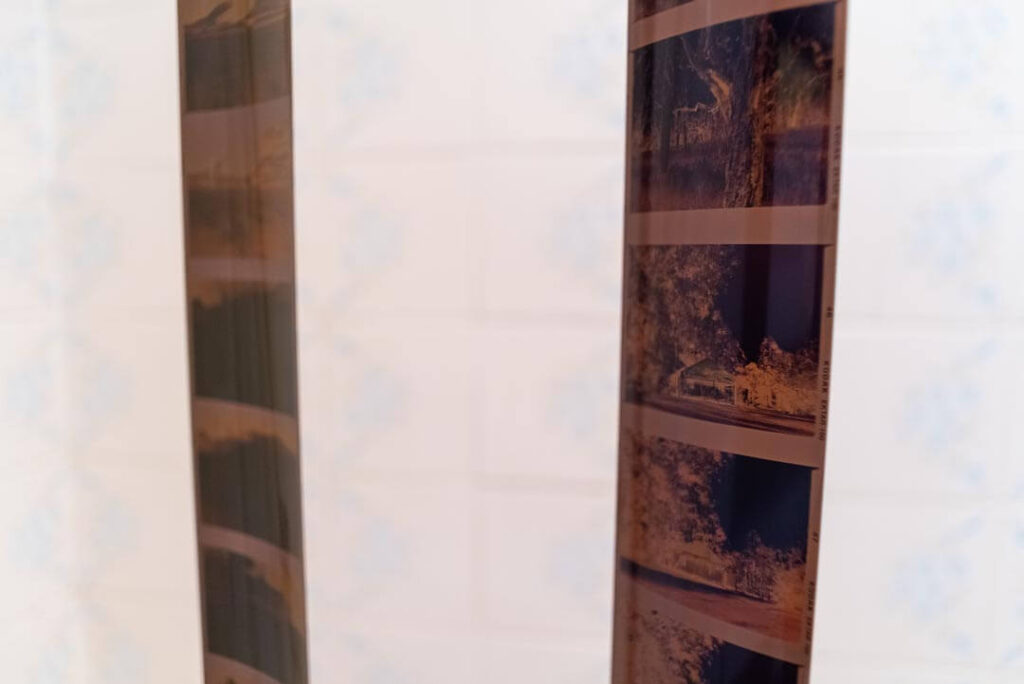
However before we handle and scan our negatives, we must give them time to dry and cure. Handling your film before it cures will make them more prone to scratches.
Drying your film simply involves hanging them somewhere dust free for a few hours.
In the bathroom or shower is a perfect place to hang your film, use some clothes pegs or film clips to hang them from the shower curtain rail or grab a coat hanger and set it up over the door.
If you used a wetting agent in your film wash, this will help water residue run off the film so there’s no marks left while it dries.
If you didn’t use an agent, you will want to squeegee your film with a film squeegee, or gently between your fingers to push excess water off the film.
Congratulations on developing your first roll of colour film!
Common Mistakes
After developing many rolls of C41 film and learning from my own mistakes I’ve put together a quick list of common issues you might have when starting out.
My film keeps jamming on the reel?
First, make sure you are loading your reel from the right side, the film will only go on in one direction and you’ll need to try this outside the dark bag on a test roll until you’re comfortable with how it works.
Second, if you have wet or sweaty hands, the film emulsion will get very sticky and not only stain your hands, but stick to itself and the reel. Try not to load film in humid conditions, or wear cotton gloves to avoid the problem.
Thirdly, if you keep your film in the fridge or freezer make sure you take it out well before you load it. Frozen film may break, and cold film with have condensation that makes everything damp and sticky in the changing bag.
My film came out blank?
Either your camera didn’t work and no images were exposed on the roll, you accidentally developed a blank roll which hasn’t been used, or you made the fatal error of blixing your film before the developer.
Always mark your used film and triple check your chemicals when developing.
My photos are really light or dark?
If you know your film was correctly exposed but the images too light or dark after developing them, your temperature and timings may be off.
A higher temperature will develop quicker so you need to reduce your developing time or you’ll push your film and they’ll come out lighter.
A lower temperature needs a longer developing time or your film will be pulled and come out darker.
There’s a colour shift on my film?
If your film has colour shifts along the edges or appearing as large circular areas in the frame it may be because you haven’t blixed for long enough.
Try blixing for longer on your next roll and see if the issue has gone.
My film has solid lines or marks on it?
Unfortunately sometimes when we load our film to develop it, we might have some of the film come off the reel and it will touch itself or the side of the reel.
When this happens the developer doesn’t contact the film properly so there are solid areas with no details because it isn’t processed.
Make sure you wind the film onto the reel slowly and try to “feel” for any resistance or bends in the film as you go. If there’s any resistance it’s usually caused by damp/humidity or debris in the reel.
These marks may also be caused from debris getting into the tank when loading it, so make sure you don’t wind up any backing paper or scraps from inside the dark bag.
My film looks muddy, dark or low contrast?
This happens when our developer is expiring, either from developing too many rolls or over time.
The best way to fix this is to mix some new developer. However if you need to process with spent chemicals, extending the development time can compensate for this to some degree.
Photographer X does their developing different to this?
I can guarantee that most photographers will photograph, develop and process their work very differently, it’s just a quirk of the art.
You will start to adjust and experiment with how you develop your colour film over time and make the process your own.
Don’t worry that what you do isn’t the same as someone else, focus on the results and ask for help if you get stuck.
Now It’s Your Turn!
I hope you’ve found this guide helpful and that you too can start enjoying and experimenting with home developing your colour film.
If you’d like some more information on developing and shooting C41 film, here are some great resources I’ve found really valuable.
2 Responses
Thank you so much! very precise and detailed! Exactly what I need to develop my color film.
Glad it helped William!